


I have so so many R kids on my caseload right now. In that past, that statement would be followed with a mournful sigh, or possibly with me throwing my head back and shaking my fists in the air cursing, “why me!?” Let me tell you… I used to struggle with how to teach the R sound.
Not anymore.
.
Years ago, for my own sanity, I began to develop a systematic approach to teaching the R. Does it work for every student? Of course not! Every child is different. Does it work for most of them?
You betcha.
.
(Before you read any further, let me say two things:
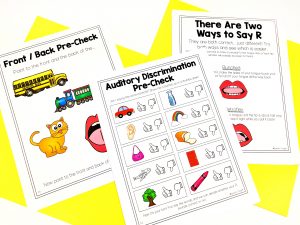
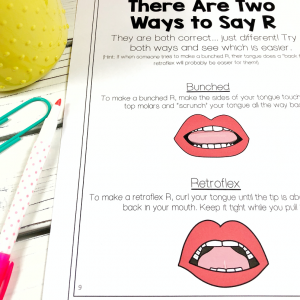
- There is a freebie for you at the end of this post. It’s a helpful visual for explaining bunched vs retroflex Rs.
- In this post, I am specifically discussing retroflex R. The reason being I find about 80% of my students prefer retroflex and find it easier to produce. That being said, even if you’re working on bunched- keep reading this post! A lot of same ideas apply.
..
If you are unsure of the types of R (bunched vs. retroflex), you can check out THIS helpful video. Or, again, keep scrolling for that freebie.
If you want to know my favorite articulation trick for determining which type of R suits a student best (bunched or retroflex), visit this other R speech therapy blog post I wrote.
…
Now, down to business.
.
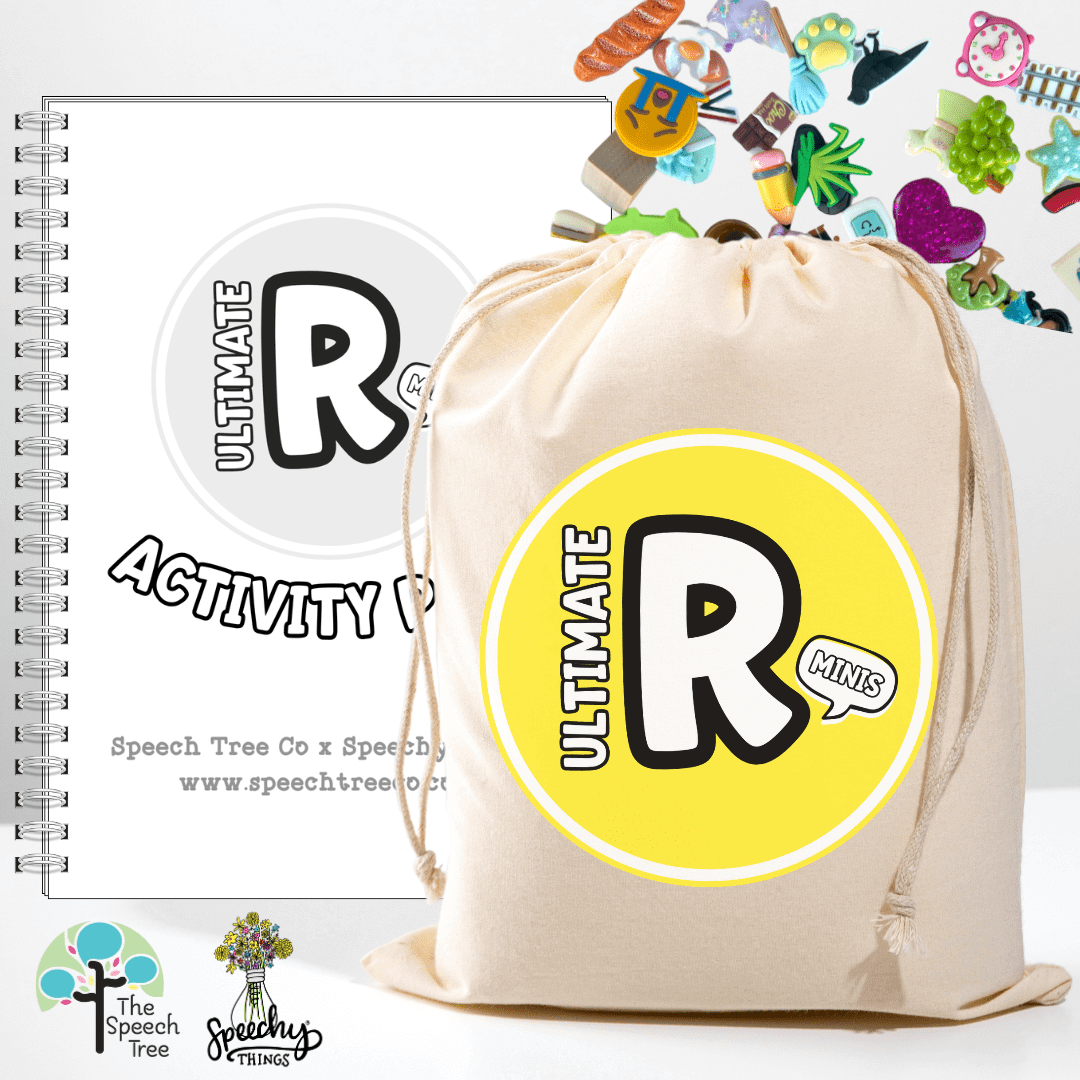
As a part of my epic quest to conquer the R sound, I began to develop various visuals (I am big on using visuals) and handouts to help my students, their parents (and me) along the way in speech therapy. I’ve compiled a bunch of these resources in my handy dandy R packet. You will see a few previews from this packet, as well as a few helpful youtube videos, in this post.
.

^There it is! My pride and joy / labor of love.
.
.
Now for the steps I use! (They’re the same as in the packet above.)
.
STEP 1:
Make sure your student can HEAR and SEE the difference between a correct and incorrect production of R. If a child can’t use visual or auditory discrimination, there is really no point in going further. This step is a must! Many kids will fly right through this.
.
.
STEP 2:
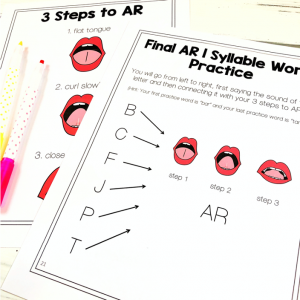
I like to start with vocalic AR and I am typically able to teach it in 3 steps: tongue flat (“ahhh”), curl tongue slowly, close the jaw a little bit.
To help kids grasp this, go nice and slow, and give them a model.
Perhaps even bust out the ol’ mirror and flashlight. I also like to use my hands as a cue (either by counting or mimicking what movement my tongue is making). I’ve demonstrated these steps in yet another video– just for you!
.
.
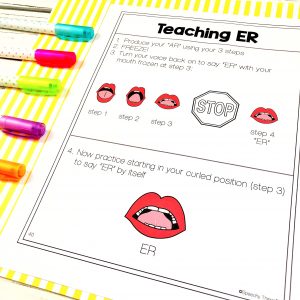
STEP 3:
Shape AR into vocalic ER. First we produce AR using our 3-steps, then we FREEZE on the 3rd step and say ER again immediately after. Continue practicing in this progression until the child is comfortable enough to produce vocalic ER without an “AR warm-up”. You can check out this helpful R sound video for further explanation. I find once we perfect our ER, the rest typically comes more easily. I want slow, careful, intentional movements. If a kiddo misses a step, I want them to know exactly which one was in error and how. Knowledge of performance is critical to motor learning! Besides, when students become “their own therapist”, they are better off!
.
.
STEP 4:
Use ER as our springboard for ALL THE REST! You heard me. If a kiddo can consistently and independently produce ER, then we are well on our way to saying the remaining vocalic R’s (ear, air, ire, or), initial (or prevocalic) R, and even R blends.
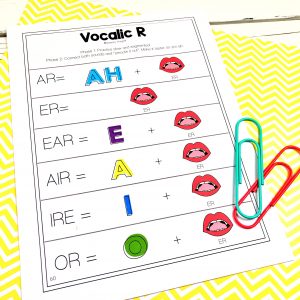
The general concept is the ER sound we have been teaching now simply represents R in the remaining forms. For example, each vocalic R turns into a little math equation.
Example: OH + ER = OR
Start practicing this segmented and slow so the vowel doesn’t distort the lovely retroflex R we have achieved. Smooth it out over time. I like to give my kids a visual support to help them speed up their production. Same goes for initial R (red becomes “errrrrred”) and try becomes (“terrrrrry”). We can speed things up once the articulators are consistent.
.
.
.
But what if…
As we all know, some kids just need more help “getting it.” If you’re finding that the R sound is eluding your student (and you!) then Eliciting R may be more helpful.
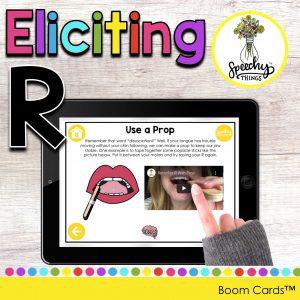
It provides even more support, visuals, cueing strategies, tongue/jaw dissociation activities, and even video examples.
.
You’ve probably guessed by now that I love treating the R sound in articulation therapy. I have spent hours and hours creating resources that help you tackle just about every obstacle you might come across with the “dreaded R sound.” They are all available on both my website and on TpT in my Ultimate R Bundle. I’ve even created a Digital R Bundle for those of us who love no-prep materials.
.
I’ve put in the time and I am here to tell you…
It doesn’t have to be scary.
.
That about sums it up! Keep in mind every kid is different. This method is simply something I have had a ton of success with (as have so many others!).
Feel free to take and leave whatever you find useful to you and your individual students. While I find that most students find incredible success with retroflex R, nothing is one size fits all. Get your free handout that gives visuals and descriptions for the difference between bunched and retroflex R. It’s pictured below! As a VIP, you’ll also receive exclusive R tips here and there.
 Go .
Go .
If you’r emore of a visual/auditory kind of person, check out this youtube video! It may help you get those 3 steps to AR.
You’ve got this!


2 responses to “Techniques for Eliciting the R Sound in Speech Therapy : How to Make Teaching R Tongue Placement Easy for your Students”
[…] (This goes double for my kids working on the R sound.) […]
[…] https://speechythings.com/teaching-retroflex-r/ […]